With the weather finally warming up here this past week (until today, it's cold, wet and in the 50's) Hattie was able to wear some of her skirts that I've made her. She wore a favorite purple one on her birthday this past Wednesday (pardon the wet hair, she likes to take a bath at night & then have me wash her hair in the morning at the kitchen sink, laying on the counter, salon style.)

This Circle Skirt is so easy to make and I found the tutorial over at MADE. I've made Hattie several, one for my niece and even one for myself!
 |
| Hattie's skirts |
So, if you'd like to make one of these yourself, I'll show you how, and you'll have your very own circle skirt for yourself or whomever, in less than an hour! (honestly, you can probably make 2 in an hour!)

What you'll need to get started:
Waist and skirt length measurements of the lucky skirt recipient
For a childs skirt, I'd say you'll need about 1 yard of {washed}fabric. For larger sizes, I'd make the pattern piece first, then figure out how much fabric you'd need. Optimal fabrics are lightweight - rayon, cotton or knit.
about 3/4 yard of white or coordinating color 2" wide elastic. Narrower than 2" is fine, I've used both but do prefer the wider. (MADE even has a tutorial for dying elastics.)
coordinating thread
To make your pattern:
Take your waist measurement and add 2". The additional 2" is for fabric "give" when it's sewn to the elastic. So for this project I will take the waist measurement of 18 inches + 2 inch = 20 inches DIVIDE BY 6.28 for the radius = 3.19 inches. For easy marking, I rounded up to a 3.25 inch radius.
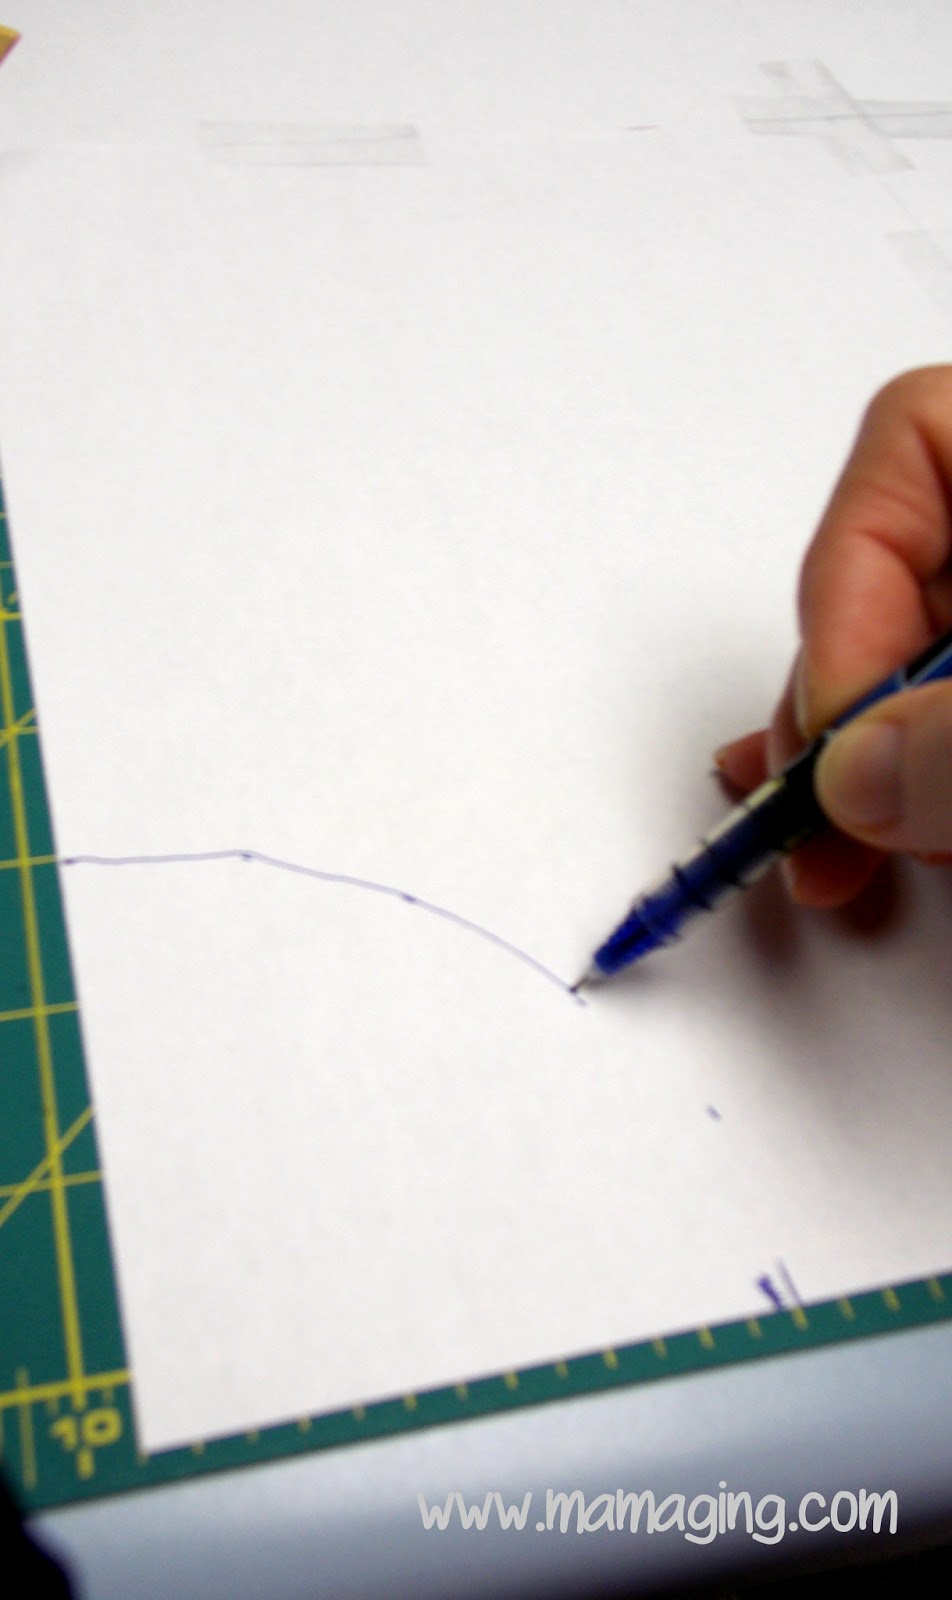
Tape some white scratch paper together. I used 4 pieces. At the bottom left corner, measure where the radius is and move your ruler up slightly every so often and mark until you get to the other side of the paper.

Connect your markings.
Now take your length measurement and add an inch for the hem. When I use knit, I just serge the bottom so I don't add for length. Measure that length from your radius marking, also moving the ruler across the page like you did for the radius.

Connect those measurements, and then cut along your lines.

You will end up with a 1/4 of a donut!

I like to fold mine in half, and make sure both sides are evened out. Trim if necessary.

Then take your fabric, fold it in half and then in half again, so you have a right-angled corner that is the fold on the left and double fold on the bottom. Lay your pattern piece on top, with edges of pattern matched up with edges of fabric like this:

Cut out your donut piece.

When cut out, this is what you will have:


I also did for the hem too as long as I was at it since that's what I prefer for knits. If you are using a cotton, do the same for the hem (fold down, press, fold down again and sew. It helps to use the smallest seam allowance possible to keep the skirt able to twirl and not be weighed down by a thick hem.)


Now for the waistband, take your elastic, fold in half.....

and sew the ends together with a 1/2" seam allowance.

Fan the seam out...

and sew down both sides.

When done, you'll have a nice, smooth waistband. If your lucky recipient is by you, try the elastic now for a good fit. If not, it's easier to adjust now than later. If you have your own labels, it would be the time to attach your label.

Now comes the tricky part... and I say tricky because you have to {in my opinion} sew blindly, while stretching your elastic on one side of your machine and pulling it the other way through your machine.
At this point your elastic will be smaller than your skirt, which is fine. You will be stretching it to the fabric to create the "fullness" of the skirt. (the following pictures are of a different fabric, I got distracted and forgot to take pictures of the purple & white skirt at this point.)

Pin your elastic to the skirt, finding the middle of the back and pin that first. Pin the elastic so that you have about 1/4" on top of the skirt. Then pin the middle of the front. Feel free to pin all around as much as you like but I found it doesn't really help, I just do the front and back.

The next step is very important - STRETCH the elastic AS YOU SEW. The picture below is of the elastic normal...

And this is sewing while you are streeeeeeeeetching..... :) You have to stretch with one hand towards you while pulling it through the machine on the other side of your foot. Sew while stretching, stop. Stretch and sew. Repeat all the way around.

Then when you are done, it looks like this!

See how quick and easy that was? It's fun to make up a bunch for little girls... my daughter loves to see how high she can twirl them! (we had a few pics we couldn't share because they were "cheeky!")


Oh, to be young again! I haven't given her the purple & white cheetah print one because I'm making a top to go with it. She's totally into gymnastics these days and since my sewing machine is also an embroidery machine, I'm going to teach myself how to embroider a gymnast with a purple leotard on the top.
The great thing about this is, you make your own pattern, so you can make the skirt in any size. Go on, give it a whirl (haha!) and make your own!

Check out where I {link} party & share my posts!

These are so cute. We're following from Buttercream Bake House Linky Party. Would love to have you follow back. We are Adorned From Above at http://www.adornedfromabove.com
ReplyDeleteDebi and Charly
Super cute! Pinned!!
ReplyDeleteThanks Diana! They're super easy and it's hard to make just one! ;)
ReplyDeleteThanks Amy! I'm excited about the group! ~ Mama Ging
ReplyDeleteThis is such a good tutorial. The skirt is wonderful and could be made to go with tops already owned as well. I think I will make one for granddaughter.
ReplyDeleteThis is a very good tutorial on the circle skirt. I think you directions are excellent. I may have to whip a few of these up in Halloween and Christmas fabric for my granddaughter.
ReplyDeleteThank you Jodie, I appreciate you stopping by! This tutorial would be very easy to make seasonal skirts as they are quick and not time consuming for something you wouldn't wear very long. I'm sure your granddaughter would love some! :) ~ Mama Ging
ReplyDelete